Getting Started with Ximilar App: Plan Setup & API Access
Ximilar App is a way to access computer vision solutions without coding and to gain your own authentication key to use them via API.

Ximilar App is a powerful tool for automating image processing—whether you want to use visual AI instantly without machine learning expertise or deploy your own custom computer vision models.
With the app, you can test available solutions, manage your user plan, and authenticate API requests using your own token. In this guide, I’ll walk you through the first steps: registering, setting up your plan, and obtaining the authentication token. Let’s get started!
Key Functions of Ximilar App
The Ximilar App serves four essential functions:
- User plan management – Set up your plan, obtain your authentication API token, and monitor API credit usage.
- Access to Ximilar solutions – Test AI models using drag-and-drop forms or integrate them via pre-set API requests.
- Interaction with the Ximilar platform – Train and deploy custom computer vision models without coding.
- Data management – Upload and label training data, create and manage visual search collections.
AI Solutions Available in Ximilar App
Ximilar App offers a range of ready-to-use AI solutions, pre-trained for specific types of data and ready to be applied to your images immediately. Later in this guide, I’ll explain how to access and integrate them via API.
Recognition & Tagging
AI-powered detection and classification for deep tagging of various visual data, from e-commerce product photos to CCTV threat detection. The number of available models is constantly growing—you can browse them on our website or in the App.
Visual Search
Our visual search powers reverse image search, multilingual text-to-image search, similar product recommendations, and duplicate image matching. Learn more about the technology here, or explore Fashion Search and Home Decor solutions directly.
Image Tools
We offer AI-powered tools for image enhancement and manipulation, including GAN and Multiplying Image Upscaler for high-quality upscaling and AI-driven Background Removal for bulk image processing.
Other Ready-to-use AI Tools
For instance, text-based AI solutions, including OCR or automated product descriptions.
Build Your Own AI Models
Ximilar App also enables users to create and deploy custom computer vision models—no coding or deep machine learning expertise required. You can build models for:
- Image Recognition & Tagging – Categorizing and labeling visual content.
- Object Detection – Identifying specific objects in images.
- Image Regression – Predicting values such as age, quality ratings, or other numerical estimations.
Now, let’s go through the first steps in the app in the recommended order.
1. Log in to Ximilar App
To use our API, you first need to log in or register in the Ximilar App. Upon registration, you’ll automatically receive a unique API token to authenticate your API requests.
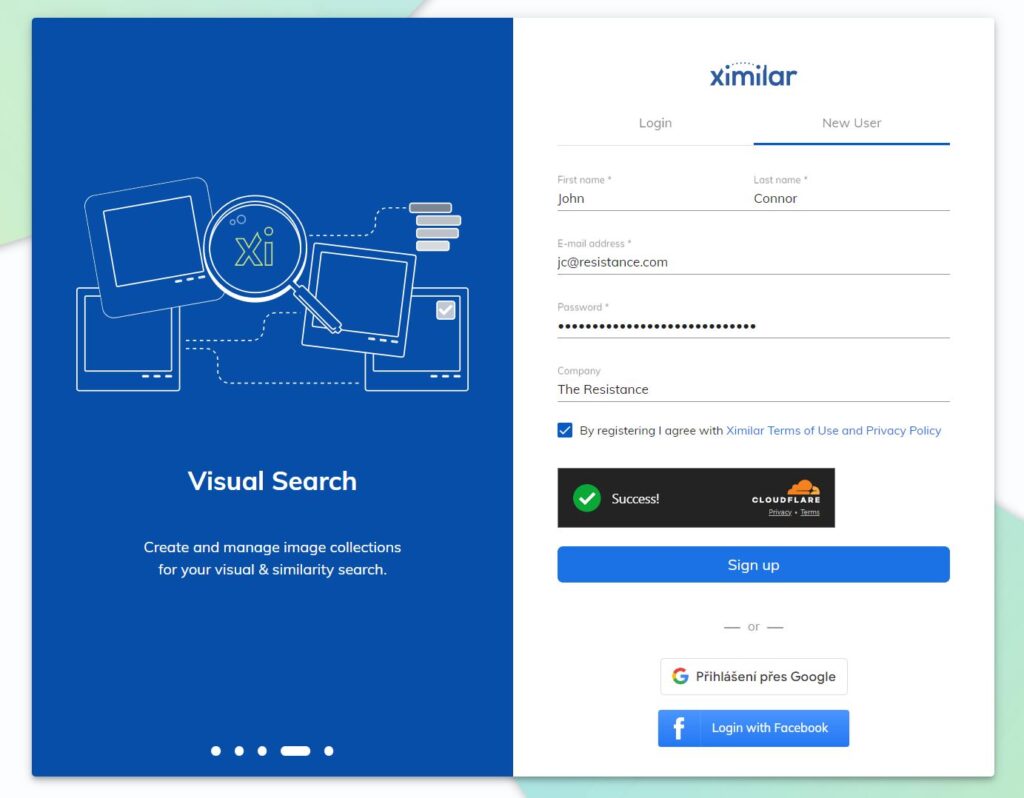
Registration is free and does not require payment information. Simply enter your email address and confirm your registration via the email we send you. You can also sign up using your Google or Facebook account.
2. App Navigation
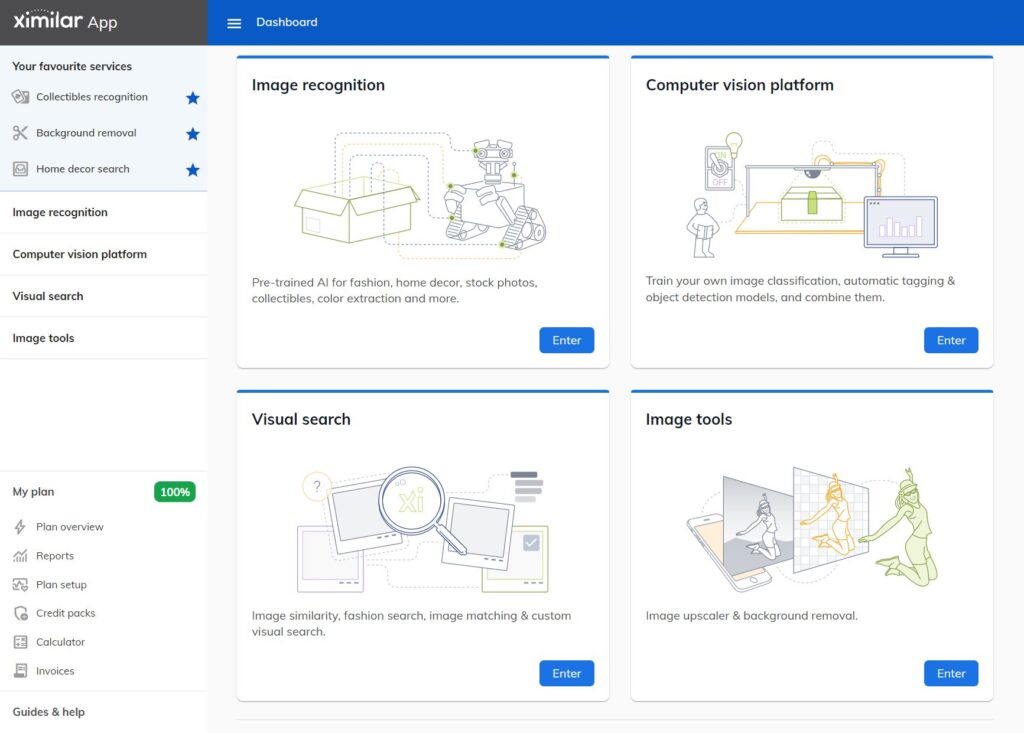
The first thing you see after entering Ximilar App is the Dashboard, which features four main service categories along with newly published articles.
The sidebar menu also lists all available services. Once you mark services as favorites by clicking the star icon next to their names, they will appear at the top for quick access.
3. Set Up Your Plan
Your plan is based on two key factors, both of which our Calculator considers:
- The solutions you want to use – Our solutions vary in complexity and are grouped into different plans. You can explore & test them both on our website (via limited demos) and in the Ximilar App, and find detailed information on our Pricing page and in API documentation.
- Your required API credit supply – Every API request uses a certain number of credits, depending on the type of operation. You can find the full list of operations and their credit costs on our Pricing page, along with their documentation links.
Use the Calculator for Automatic Setup
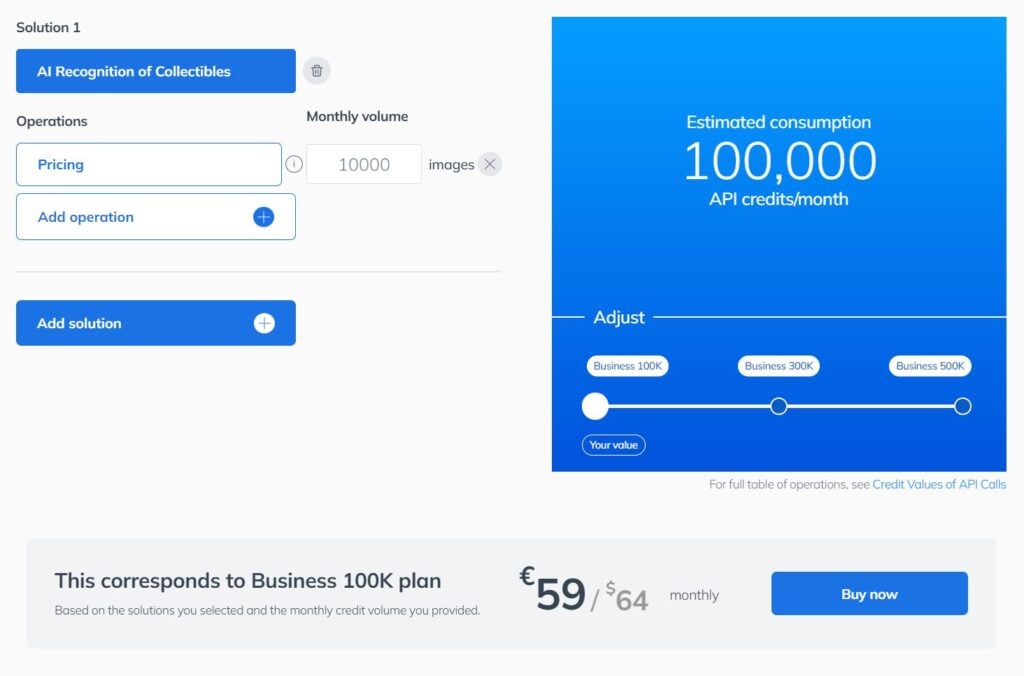
The Credit Consumption Calculator automatically suggests a subscription plan based on your selected solutions and expected usage. Follow these steps:
1) Open the Calculator – Under My plan in Ximilar App sidebar or on our Pricing page.
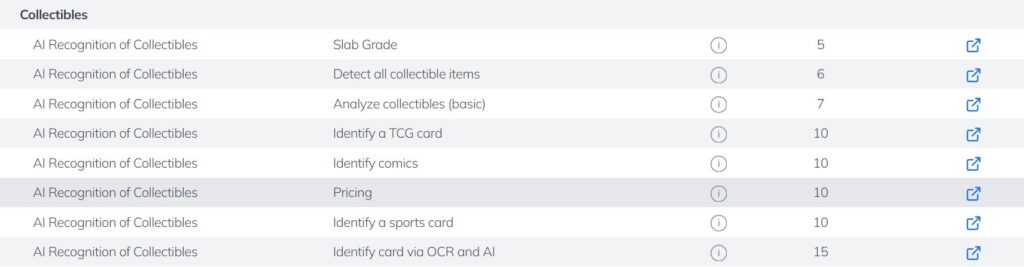
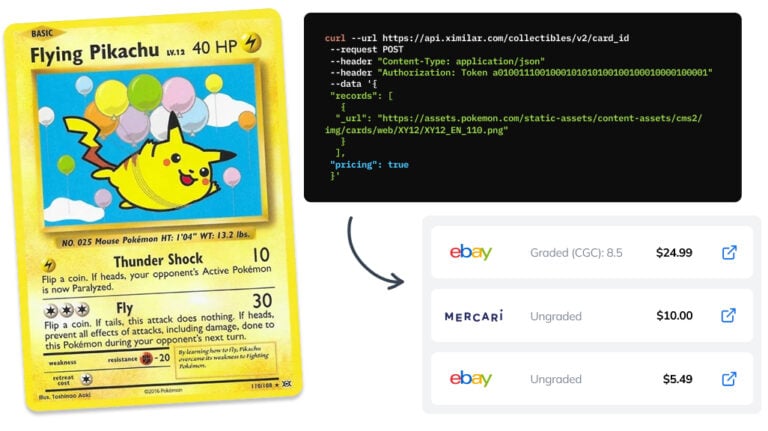
2) Choose Your Solution & Operation – Select the AI solution you need (e.g., AI Recognition of Collectibles) and the type of operation (e.g., Pricing).
3) Enter Your Estimated Monthly Usage – Input the number of images you expect to process per month, and the calculator will recommend the best plan for your needs.
Clicking “Buy now” won’t take you directly to checkout. Instead, it pre-selects the plan in Plan setup, where you can review the included solutions, features, limits, and credit supply before proceeding to checkout.
For example, here I selected solution AI Recognition of Collectibles, and estimated I will need to retrieve price for 10,000 images (collectible items) per month. The calculator suggested the Business 100K plan. I received a direct link to the recommended plan.
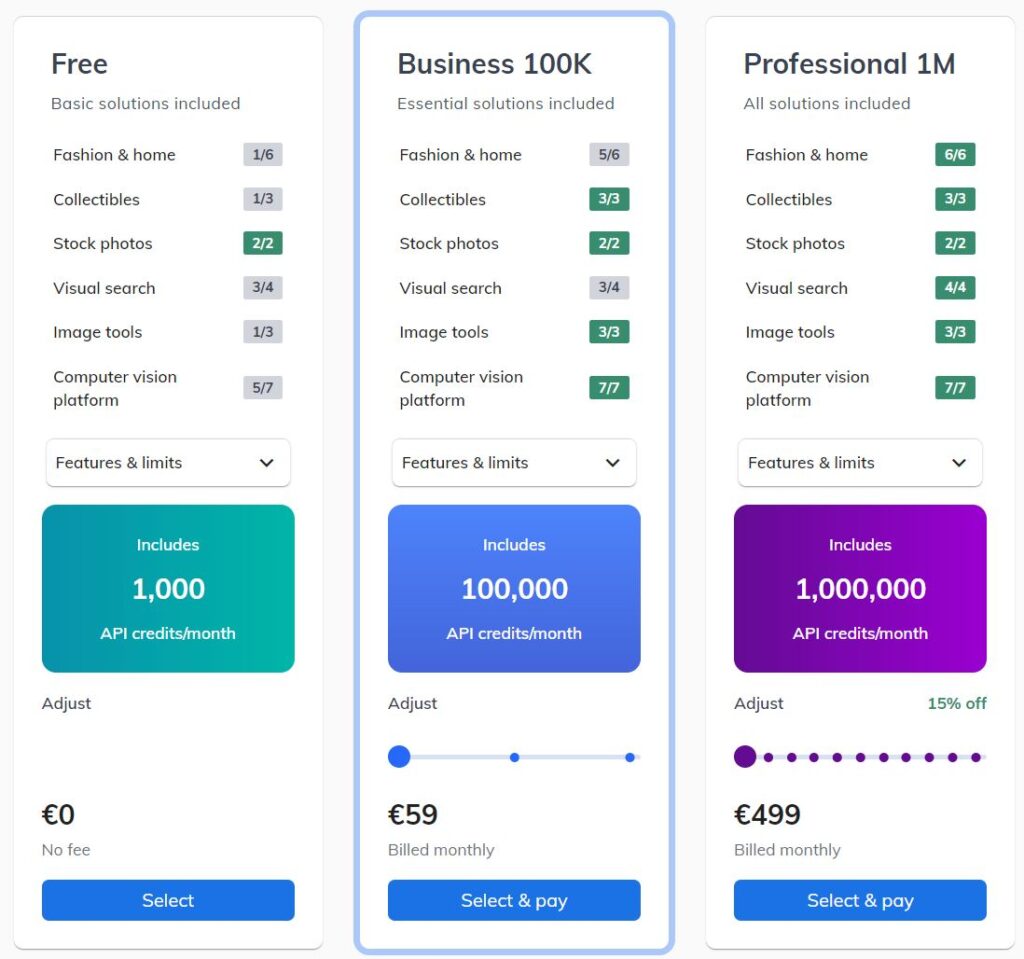
Finish the Setup at the Plan Setup Page
If you already know which solutions and how many credits you need, or if the calculator has suggested a plan, head to the Plan setup page. Since I used the calculator, my Business plan is pre-selected with 100,000 monthly credits on the slider.
In the Plan setup, you can:
- Review the included solutions, features, and limits.
- Proceed to checkout, provide your invoicing details, review the price and VAT, and complete the payment via Stripe.
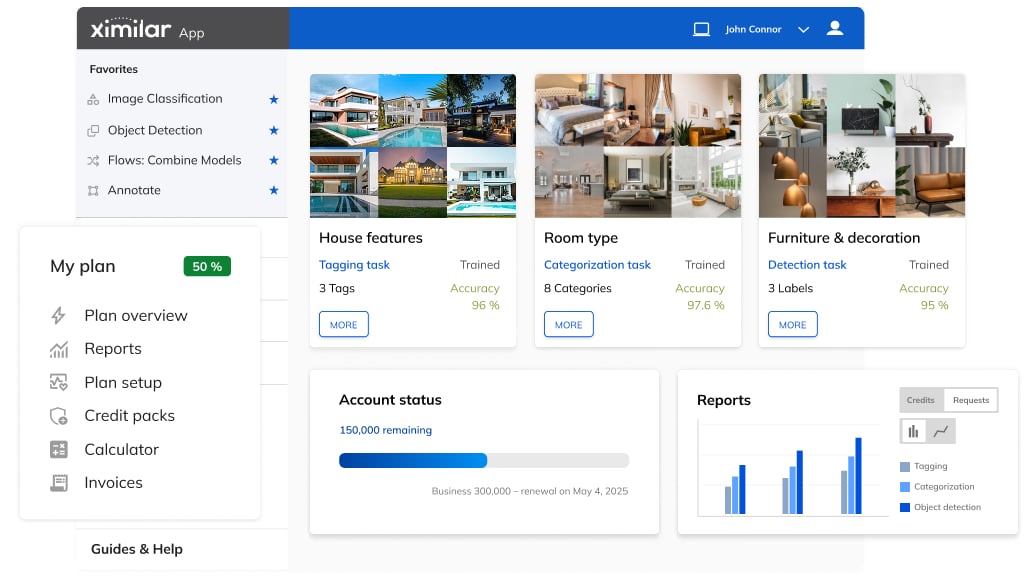
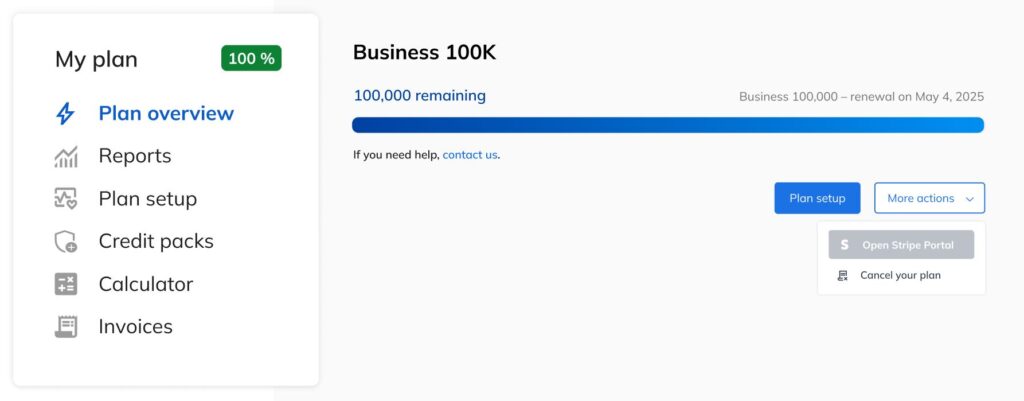
Check Your Plan Overview
Right after subscribing, I can see in Plan overview that my Business 100K plan is active. The My plan section in the sidebar shows a tag indicating the percentage of my remaining monthly credits. I can now connect to the paid solutions on the Ximilar platform.
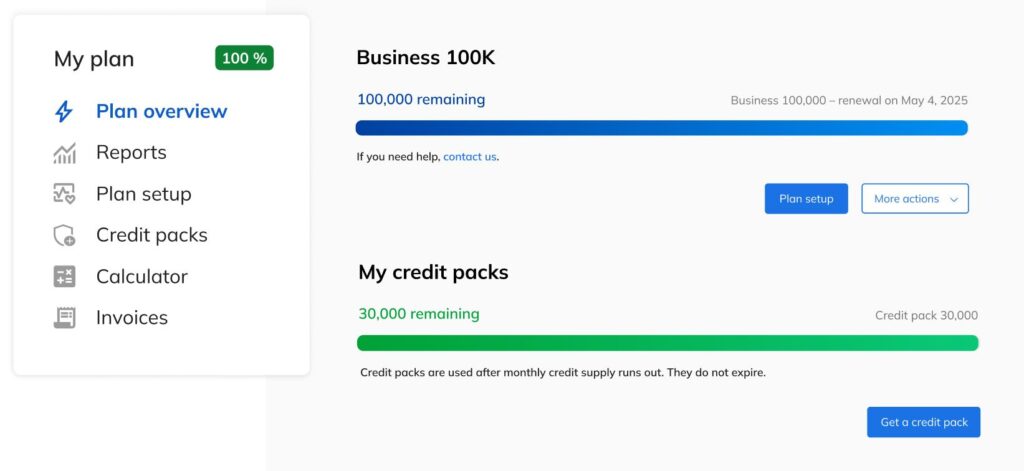
Tip: Extend Your Credit Supply with Credit Packs
If you have a large batch of images to process at the beginning but want to keep your monthly credit supply as low as possible afterward, credit packs are a perfect solution.
These packs are only used once your recurring monthly credits run out, ensuring you never run out of processing power when you need it. They also never expire, acting as a reliable safety net for unexpected usage spikes.
However, if you anticipate steady monthly usage, choosing a slightly higher monthly credit plan is the better option. The more credits included in your subscription, the lower their overall cost, making it a more efficient long-term choice. In the Plan setup, you can also see the percentage you save by opting for a higher subscription tier.

We are always here to answer your questions through the contact form or chat and can also do the setup for you.
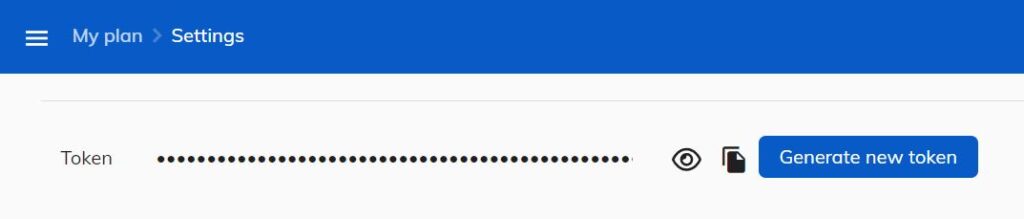
4. Locate Your API Token
You can find your authentication token in the Settings. This token serves as your key to accessing our services via the REST API.
We strongly recommend keeping it private, as it functions as your authentication credential.
- In the Ximilar App, navigate to Settings via user icon in the top right corner.
- View your API Token—this is required to authenticate API requests.
- Copy the token and store it securely (do not share it publicly). As you can see, you can also generate a new API token.
5. Integration via Python
Install Python and Required Libraries
Before using the Ximilar API, make sure you have Python 3.6 or later installed. Some systems already include Python, but if you’re unsure, you can check by running this command in your terminal, command prompt, or shell:
python --version && pip --versionA correct output should look like this:
Python 3.9.18
pip 23.1 from /Users/yourname/env/devel/lib/python3.9/site-packages/pip (python 3.9)
If you don’t have Python installed, follow this tutorial on RealPython, which contains installation steps for Windows, macOS, and Linux. Once Python is ready, install the required libraries using pip:
pip install --upgrade argparse requestsNow you’re all set to start working with the Ximilar API!
Example: Pricing Trading Cards via REST API
This script sends an image of a trading card to the API for identification and pricing:
import sys
import requests
import pprint

url = "https://api.ximilar.com/collectibles/v2/tcg_id"
headers = {
  "Content-Type": "application/json",
  "Authorization": f"Token {sys.argv[1]}"
}
data = {
  "records": [
    {"_url": sys.argv[2]}
  ],
  "pricing": True
}

response = requests.post(url, headers=headers, json=data)
pprint.pprint(response.json)
How it works:
- The script takes two command-line arguments: your API token (
sys.argv[1]) and the card image URL (sys.argv[2]). You can replace these with direct variable assignments if needed. - It sends a POST request with the image URL to the API.
- The
"pricing": Trueparameter requests price details. - The response, including the card’s details and estimated price, is printed using
pprint.
Conclusion
If you have any questions or need help along the way, feel free to reach out. Our team is here to assist you. For more in-depth guidance, explore our other articles covering advanced features, best practices, and API integrations.
We also understand that not everyone wants to handle API integration on their own, and that’s completely fine. If you prefer a hassle-free setup, we can take care of everything for you—from configuring your plan to integrating our solutions into your workflow. Just let us know, and we’ll be happy to assist.

Tags & Themes
Related Articles
How to Automate Pricing of Cards & Comics via API
A step-by-step guide on how to easily get pricing data for databases of collectibles, such as comic books, manga, trading card games & sports cards.

Get an AI-Powered Trading Card Price Checker via API
Our AI price guide can be used for value tracking of cards and comic books, offering accurate pricing data and their history.

Identify Comic Books & Manga Via Online API
Get your own AI-powered comics and manga image recognition and search tool, accessible through REST API.